Increase PHP Memory Limit in cPanel is a common task, especially when your website experiences memory-related errors like “Allowed memory size of X bytes exhausted”. This issue often arises in scenarios where web applications or plugins require more memory to execute processes. Below is a comprehensive, step-by-step guide on how to increase the PHP memory limit in cPanel, detailed to cover various hosting configurations.
Increase PHP Memory Limit in cPanel
Step 1: Log in to Your cPanel Account
To begin:
- Open your web browser and navigate to your hosting provider’s cPanel login page.
- Enter your username and password.
- Click Login to access the cPanel dashboard.
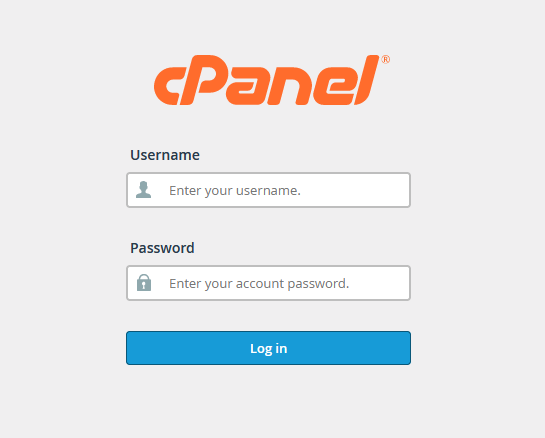
Once logged in, you’ll find several tools for managing your hosting environment, including PHP configurations.
Step 2: Locate the PHP Configuration Tools
In cPanel, there are typically two primary tools you can use to modify the PHP memory limit: PHP Selector and MultiPHP INI Editor. The option available depends on your hosting provider’s setup.
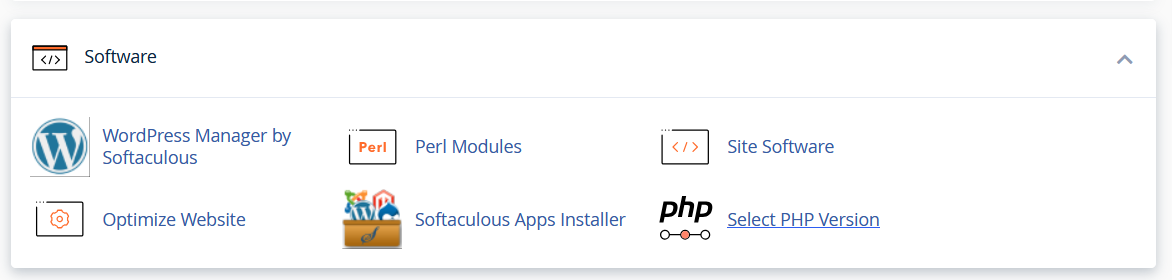
Option 1: PHP Selector
- In the cPanel dashboard, look for Select PHP Version or PHP Selector under the Software section.
- Click to open it, and select your current PHP version (if not already selected).
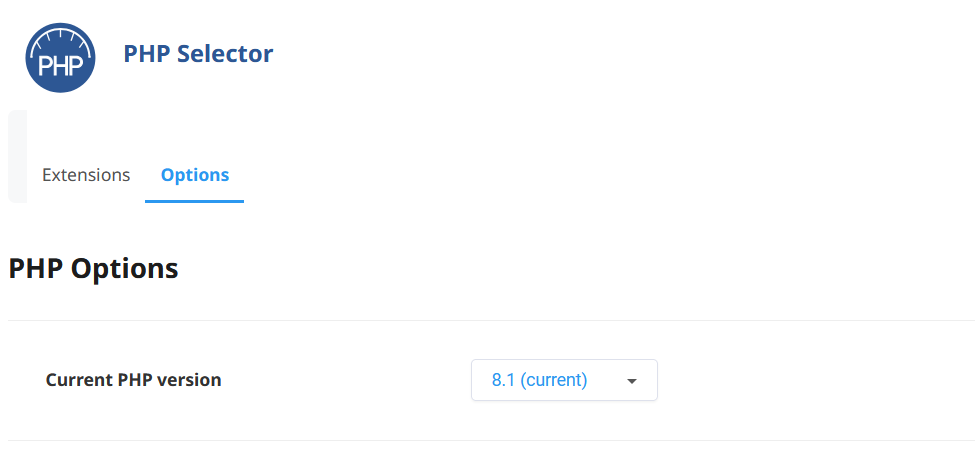
- Look for an option such as Switch to PHP Options or Options to access editable PHP settings.
Option 2: MultiPHP INI Editor
- Alternatively, find and click MultiPHP INI Editor, also located in the Software section.
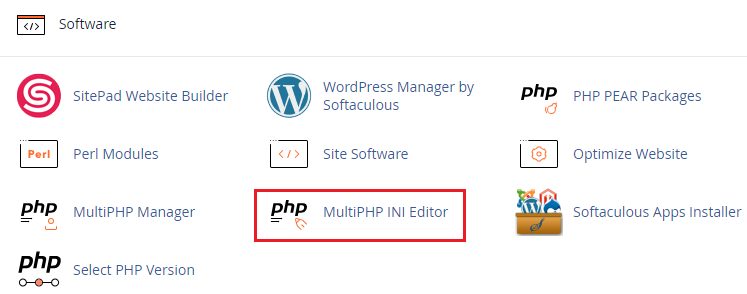
- This tool allows you to directly edit the
php.iniconfiguration for specific domains or directories.

- From the dropdown menu, choose the domain or directory you wish to modify.
Step 3: Increase PHP Memory Limit in cPanel
Once you’ve accessed the appropriate tool, follow these steps to modify the memory limit:
Using PHP Selector:
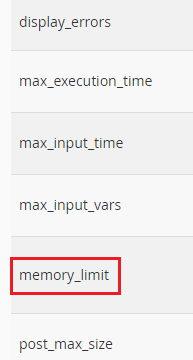
- In the PHP Options, locate memory_limit in the list of settings.
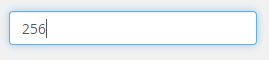
- Click the value next to it, and either select or manually enter a higher limit (e.g.,
256M,512M, or another suitable value).
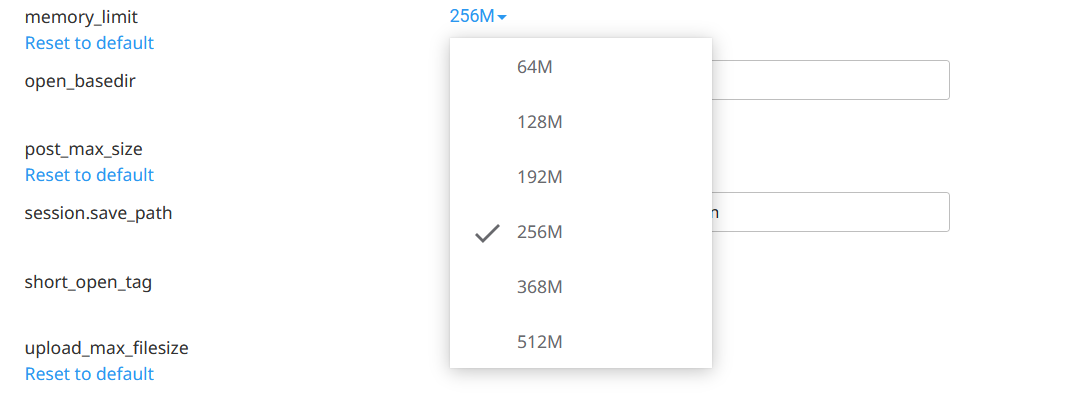
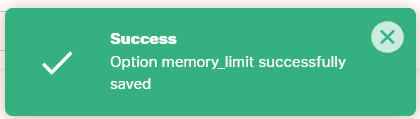
- Save your changes to apply the new memory limit.
Using MultiPHP INI Editor:
- After selecting your domain, a list of PHP directives will appear.
- Scroll to find memory_limit.
- Modify the value by entering your desired limit (e.g.,
256Mor512M).
- Click Apply or Save to confirm the changes.

Step 4: Verify the Changes
It’s important to confirm that Increase PHP Memory Limit in cPanel is now active. To do this:
- Create a
phpinfo.phpfile in your website’s root directory:
- Open any text editor and insert the following code:
php <?php phpinfo(); ?> - Save the file as
phpinfo.phpand upload it to your website’s root folder using the cPanel File Manager or an FTP client.
- Open your web browser and navigate to
http://yourdomain.com/phpinfo.php. - On the resulting page, search for the memory_limit directive to confirm it reflects the new value.
Step 5: Troubleshooting
If the new memory limit doesn’t take effect:
- Check for Application Overrides: Some applications (e.g., WordPress, Joomla, or Magento) may have their own configurations in files like
.htaccess,php.ini, orwp-config.php. Update the memory limit in these files as needed.
- For WordPress, edit the
wp-config.phpfile and add the line:php define('WP_MEMORY_LIMIT', '256M');
- Server Restrictions: On shared hosting plans, the maximum PHP memory limit may be restricted by your hosting provider. Contact their support team for further assistance if necessary.
- File Permissions: Ensure the
php.inior.htaccessfile you edited has the correct permissions for changes to be applied.
Why Increase PHP Memory Limit in cPanel?
Increasing the PHP memory limit is essential for:
- Handling Resource-Intensive Applications: Applications like WordPress, Drupal, or Joomla often require higher memory for plugins or themes.
- Avoiding Script Failures: Large files or complex scripts can fail without sufficient memory.
- Improved Performance: Allowing more memory ensures smoother operation of dynamic websites.
Precautions
- Avoid Overuse: Setting an excessively high memory limit on shared hosting can impact server performance and affect other users.
- Consider Your Hosting Plan: If your hosting plan consistently struggles with memory limits, upgrading to a VPS or dedicated server may be a better long-term solution.
By following this guide, you can successfully Increase PHP Memory Limit in cPanel and ensure your applications run smoothly. Confirm your changes and monitor your website’s performance to avoid further issues. Let me know if you encounter any challenges!