Enable 2FA for Webmail in cpanel significantly improves your email security by requiring not only your password but also a unique code generated on your smartphone. This additional layer of protection ensures that even if someone gains access to your password, they would still need the second authentication factor to log in. This guide walks you through the steps to enable 2FA for Webmail in cpanel.
Why Enable 2FA for Webmail?
Webmail is a common target for hackers and phishing attacks since it often contains sensitive information, including personal details, financial data, and business communications. Enable 2FA for Webmail in cpanel ensures that your email account is better protected, reducing the risk of unauthorized access and identity theft.
Step-by-Step Guide to Enabling 2FA on Webmail
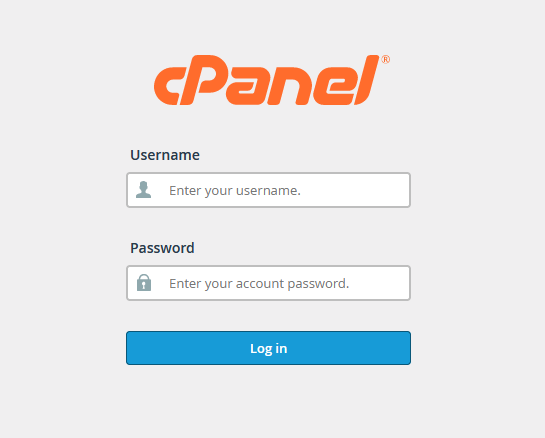
Step 1: Log in to Your cPanel Account
To Enable 2FA for Webmail in cpanel, you first need to log into your cPanel account. Follow these steps:
- Access cPanel: In your web browser, enter the URL for your cPanel. This is usually
www.yourdomain.com/cpanel. If you’re unsure of your cPanel URL, check with your hosting provider. - Login with Your Credentials: Enter your cPanel username and password to access the cPanel dashboard. These credentials are usually provided by your web hosting company when you first set up your account.
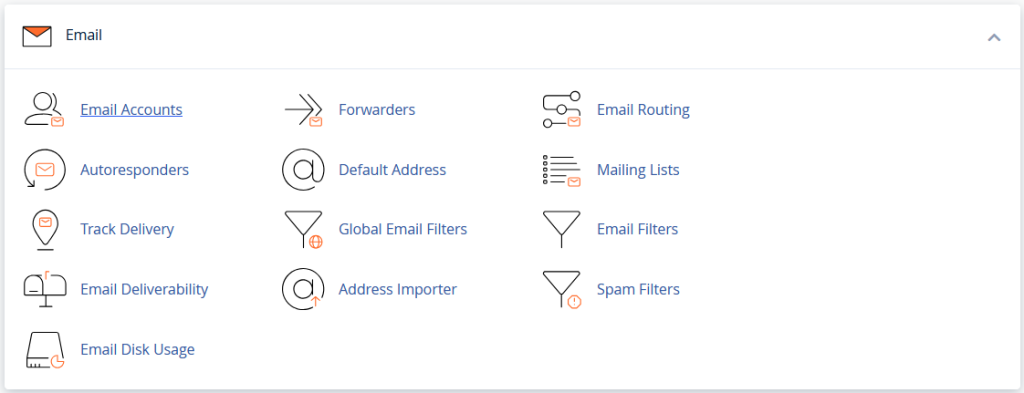
Step 2: Go to the Email Accounts Section
Once logged into cPanel:
- Navigate to the “Email” Section: In your cPanel dashboard, look for the Email section, which contains various email management tools.
- Select “Email Accounts”: Click on Email Accounts to view a list of all the email addresses associated with your domain.
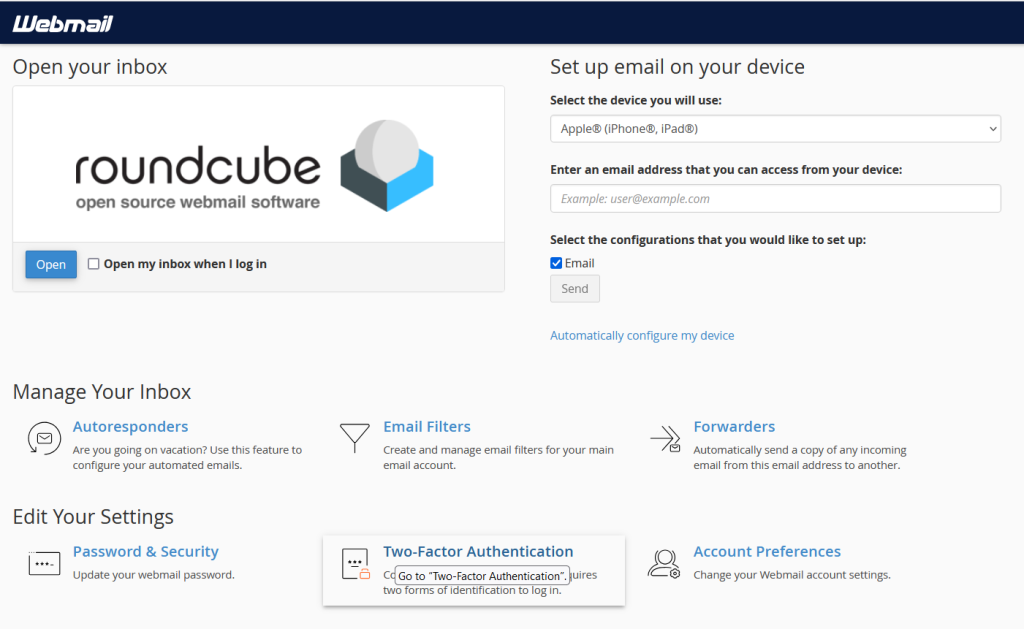
Step 3: Manage the Webmail Account
After you access the Email Accounts page:
- Find the Email Account: From the list of email addresses, locate the Webmail account you want to secure with 2FA. This will be the email address you use to log into Webmail.

- Click “Manage”: Next to the email account, you’ll see a Manage button. Click it to access the account settings for that specific email address.
- In some versions of cpanel, 2FA option will located in Check mail option, so if you can’t locate 2FA in manage then check in this option
Step 4: Enable 2FA for Webmail in cpanel
Some hosting providers allow 2FA directly for Webmail. Here’s how you can Enable 2FA for Webmail in cpanel:
- Check for 2FA Option: Under the Manage section of your email account, look for a security setting that offers the option to enable Two-Factor Authentication (2FA). It could be listed under Security Settings, Account Settings, or a similar category.
- Important Note: Not all hosting providers offer 2FA directly for Webmail. If you don’t see the 2FA option here, it’s possible that your web hosting provider hasn’t made this feature available. You may need to contact your web hosting provider for assistance or ask if this feature can be enabled.
- Enable 2FA: Once you locate the 2FA option, click to enable it. You will be prompted to begin the setup process.

Step 5: Set Up Two-Factor Authentication
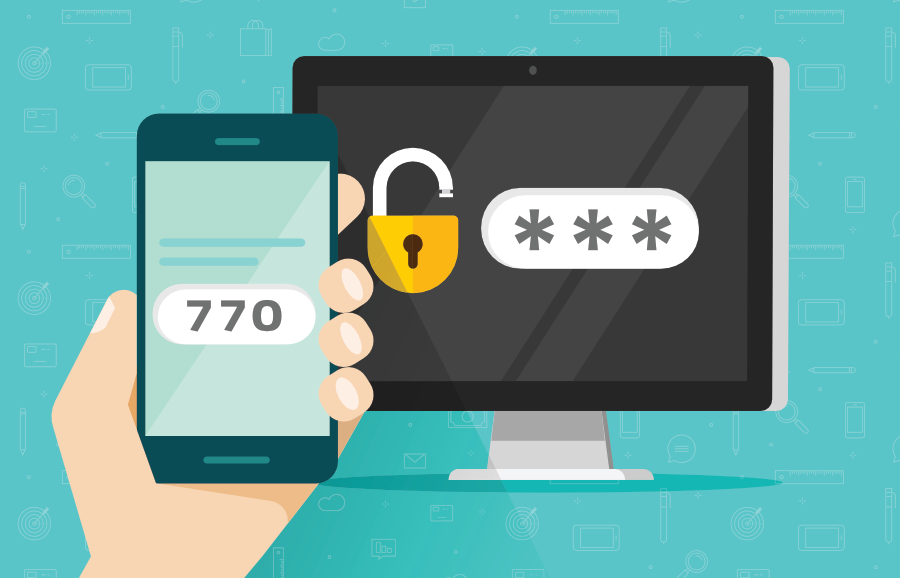
After Enable 2FA for Webmail in cpanel, you need to complete the setup process by connecting your Webmail to an authenticator app on your smartphone. Here’s how:
- Download an Authenticator App: If you don’t already have one, download a trusted authenticator app like Google Authenticator, Authy, or Microsoft Authenticator from your app store.
- Scan the QR Code: On the cPanel screen, you will be presented with a QR code. Open your authenticator app and scan the QR code displayed. This links your email account with the authenticator app.
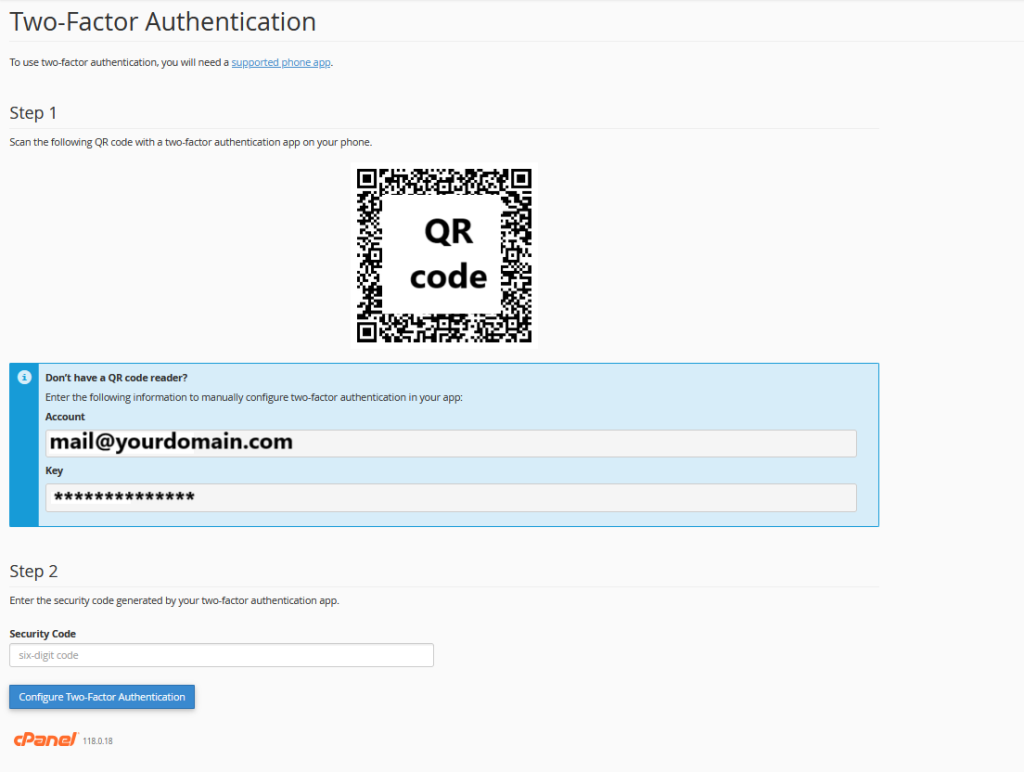
- Enter the Verification Code: After scanning the QR code, the authenticator app will generate a 6-digit code. Enter this code into the required field in your cPanel to complete the setup. This code refreshes every 30 seconds to ensure security.
Step 6: Logging in to Webmail with 2FA
Now check the Enable 2FA for Webmail in cpanel, the login process will change slightly.
- Access Webmail: Open your web browser and go to
webmail.yourdomain.comto log in. - Enter Your Credentials: Use your usual email address and password to begin the login process.
- Enter the 2FA Code: After entering your password, you’ll be prompted to enter the 6-digit code generated by your authenticator app. Open the app on your phone and type in the current code displayed to complete the login process.
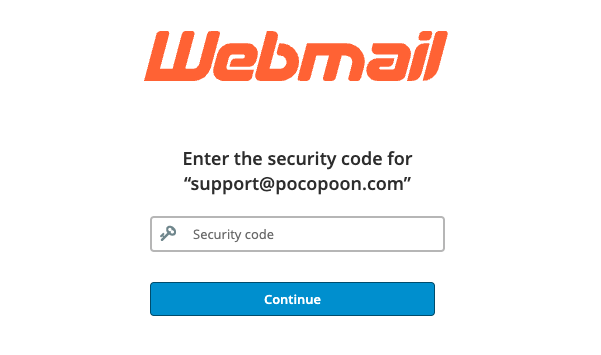
This additional step ensures that only someone with access to both your password and the 2FA code from your phone can log into your Webmail account.
Step 7: Backup Codes (Optional but Recommended)
During Enable 2FA for Webmail in cpanel process, many systems provide backup codes. These are a series of one-time-use codes that can be used if you lose access to your authenticator app or smartphone. It’s crucial to:
- Download Backup Codes: If your cPanel or hosting provider offers backup codes, download and save them in a secure place, such as a password manager. These codes allow you to access your Webmail account in case your phone is lost or stolen.
- Keep Backup Codes Secure: Since these codes bypass the need for 2FA, treat them as you would your password—store them securely and avoid sharing them with anyone.
Managing 2FA or Disabling It
If you ever need to disable or reset 2FA for Webmail:
- Log into cPanel and navigate back to the Two-Factor Authentication section.
- Remove or Reset 2FA: You can either remove 2FA entirely or reset it to use a different device or app by generating a new QR code and repeating the setup process.
Enabling Two-Factor Authentication (2FA) for Webmail through cPanel adds an essential layer of security to your email account. Enable 2FA for Webmail in cpanel, even if someone obtains your password, they will still need the unique code from your phone to access your email. For maximum security, make sure to store backup codes securely and keep your authenticator app accessible. By taking this extra step, you protect your Webmail from unauthorized access and safeguard your sensitive information.