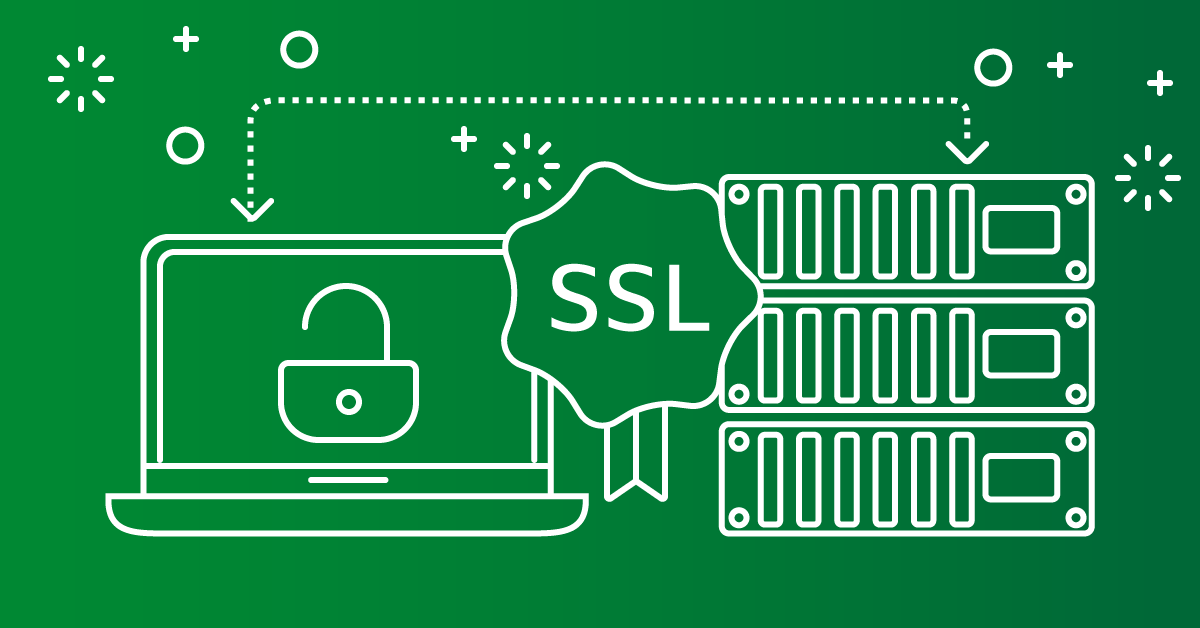
Remove Certificate from AutoSSL in cpanel can be a necessary step when transitioning between certificates, dealing with security updates, or simply cleaning up unused certificates. While AutoSSL in cPanel is a convenient tool for automatically installing and renewing SSL certificates, there might be times when you need to manually remove a certificate. This guide will walk you through the process of doing so step-by-step, providing detailed instructions to ensure remove Certificate from AutoSSL in cpanel properly.
Step-by-Step Guide to Remove SSL Certificate from AutoSSL in cPanel
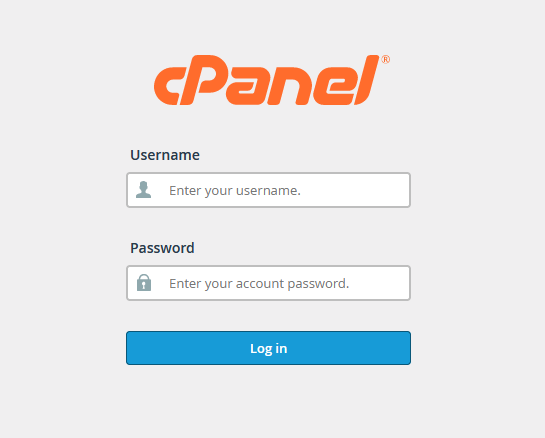
1. Log in to Your cPanel Account
The first step is to access your cPanel account. To do this, open a web browser and type in the URL provided by your hosting provider, typically something like yourdomain.com/cpanel or yourdomain.com:2083. Enter your username and password to log in. Once logged in, you will have access to various tools and services to manage your hosting account.
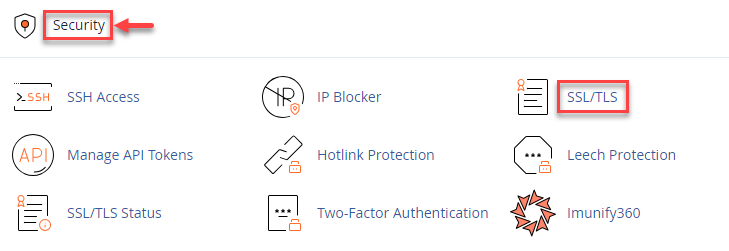
2. Navigate to the SSL/TLS Manager
After successfully logging in, the cPanel dashboard will display a wide range of options. Look for the section labeled “Security” or simply search for “SSL/TLS ” in the cPanel search bar. The SSL/TLS Manager is where all the certificates, keys, and management tools related to SSL are located. Once located, click on the “SSL/TLS” icon to access the management page for SSL certificates.
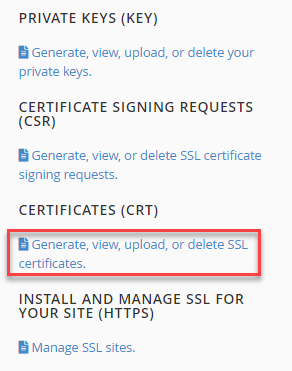
3. Select ‘Manage SSL Sites’
Inside the SSL/TLS Manager, you’ll be given several options for handling SSL certificates. The option you’re looking for is “Generate, view, upload, or delete SSL certificates” This section allows you to view all the domains hosted in your account, along with the SSL certificates currently applied to each domain or subdomain.
Clicking on “Generate, view, upload, or delete SSL certificates” will bring you to a list of installed certificates, where each domain associated with your hosting account is listed with its corresponding SSL certificate information.
4. Identify the SSL Certificate to Be Removed
Once you’re inside the Manage SSL Sites page, scroll through the list of domains to find the specific domain or subdomain for which you want to remove Certificate from AutoSSL in cpanel. Each domain entry will display information about the SSL certificate installed on it, such as the issuer, expiration date, and type of certificate (whether it is AutoSSL or another type).
It’s important to ensure that you’re selecting the correct domain before proceeding. Double-check the domain name and any associated subdomains to prevent accidental removal of the wrong certificate.
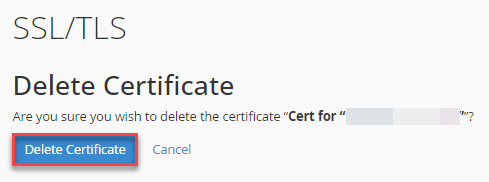
5. Remove Certificate from AutoSSL in cpanel
Next to the domain entry, there should be an option that allows you to delete and Remove Certificate from AutoSSL in cpanel. This may be labeled as “Delete”. Click this button to begin the process of removing the SSL certificate from the domain.

Upon clicking the delete option, cPanel will prompt you with a confirmation dialog box to make sure you want to proceed with the deletion. This is a safety feature to prevent accidental removal of important certificates. Read the confirmation carefully and, if you’re sure you want to remove Certificate from AutoSSL in cpanel, confirm the action.
6. Wait for Confirmation of Removal
After confirming, cPanel will process the removal of the SSL certificate. This typically only takes a few seconds. Once completed, you should see a success message or notification stating that the SSL certificate has been successfully remove Certificate from AutoSSL in cpanel from the domain.
7. Check and Verify the Removal
To ensure that the SSL certificate was successfully remove Certificate from AutoSSL in cpanel go back to the Manage SSL Sites section. The domain that previously had an SSL certificate should no longer display certificate information. If it still appears to have a certificate, try refreshing the page. In some cases, cPanel may take a moment to update the interface.
If you encounter any issues or if the certificate doesn’t seem to be removed, consider clearing your browser’s cache or logging out and back in to see if the changes have taken effect. Alternatively, contacting your hosting provider’s support team for assistance might be necessary.
Important Considerations
- Impact on Security: Removing an SSL certificate will mean that your website will no longer be secured with HTTPS, which can lead to security warnings for users. Ensure you have a plan for replacing the SSL certificate if security is a concern.
- Browser Caching: Even after removing an SSL certificate, some browsers may cache the HTTPS version of your site for a while. This might result in mixed content warnings or redirect loops until the cache is cleared.
- Reinstalling SSL: If you need to reinstall an SSL certificate after removal, you can do so via the same SSL/TLS Manager in cPanel. You can either generate a new certificate or upload a third-party certificate if required.
Removing an SSL certificate from AutoSSL in cPanel is a straightforward process, though it requires careful attention to ensure you’re removing the correct certificate for the correct domain. By following the steps outlined above, you can remove unwanted or outdated SSL certificates while maintaining control over your website’s security. Always ensure that you have a replacement certificate ready, especially if your site requires continuous HTTPS support.